Intro to ERC20 Tokens
Welcome to the first module of Stable School's developer content. In this course, we will go from zero to building your own stablecoins using different techniques and mechanisms.
In this first module, we will recap how to build an ERC20 contract, which is fundamental to stablecoin development.
Watch this step-by-step video doing a recap of the ERC20 standard.
This tutorial assumes the reader has basic knowledge of Solidity. If you need a refresher, we recommend following the Level Up Solidity Lessons.
Now, let's get started with the ERC20 standard and Ethereum basics.
The ERC20 standard
At its core, tokens can be represented as a hashmap of balances (learn more about hashmaps here), where the key is the account that owns the tokens, and the value represents the account’s balance.
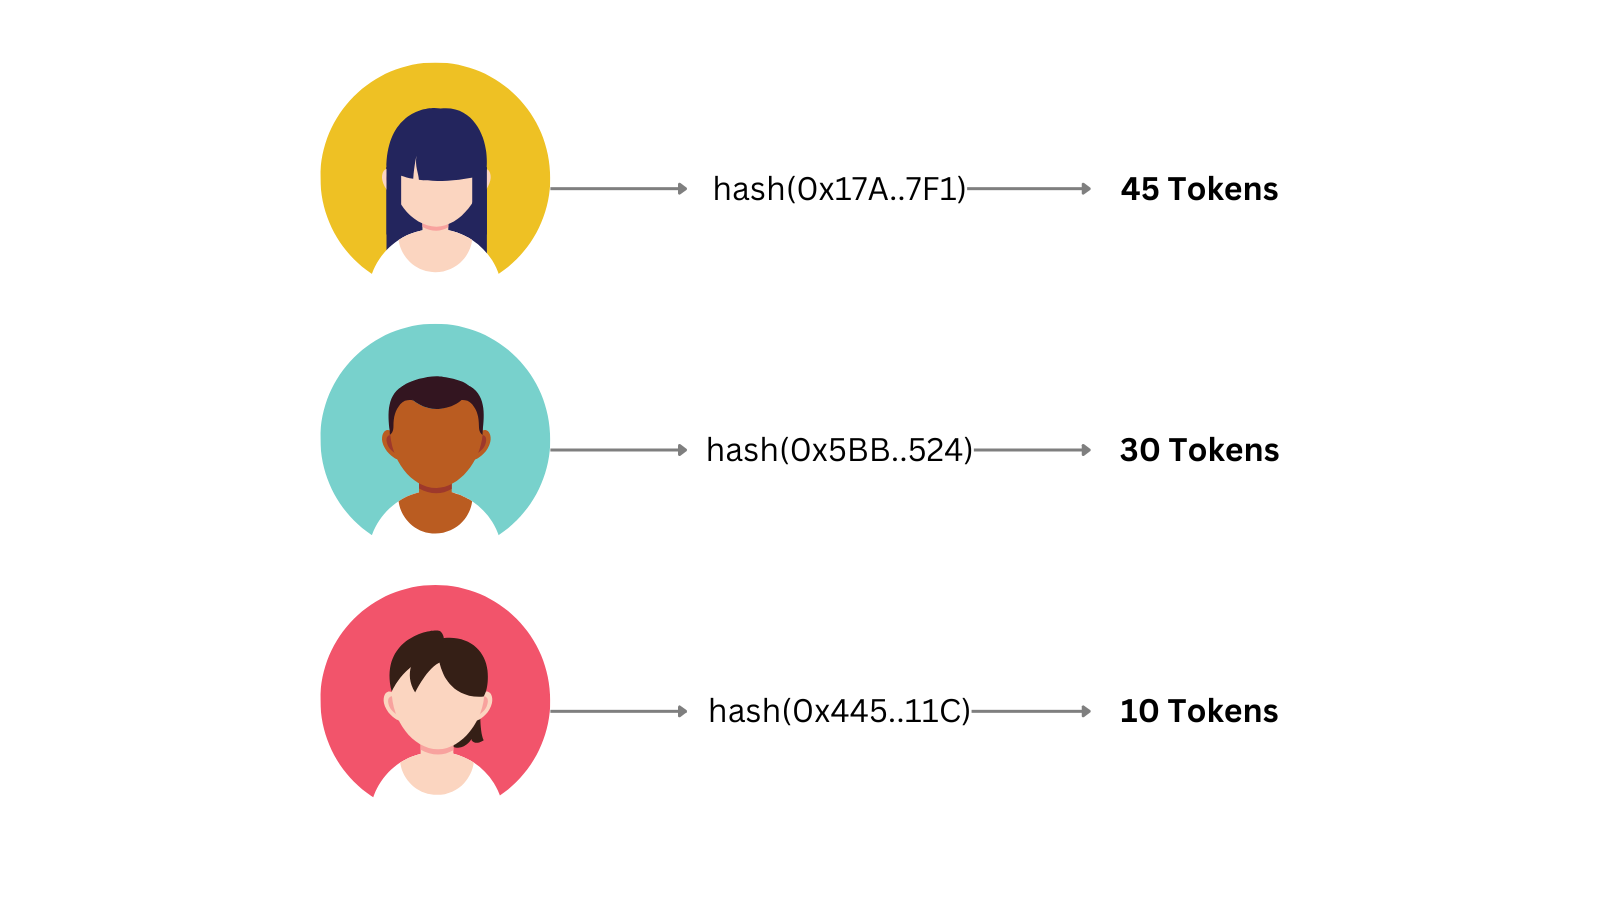
Token contracts can be represented as hashmaps where the key is the account's owner and the value the account's balance.
In Solidity, we can define it as:
mapping(address account => uint256 balance) public balanceOf;
When a user transfers tokens, their balance is deducted, and the recipient's balance is increased. Building on this foundation, we can introduce additional mechanics such as limited supply, yield generation, vesting schedules, transaction fees, and more.
To ensure compatibility across different applications, the ERC20 standard was introduced. This standard allows tokens to interact and become interconnected. This enabled DeFi applications like decentralized exchanges that support any ERC20-compliant token.
The core ERC20 functions that all compliant tokens must implement include:
totalSupply()– Returns the total token supply.balanceOf(address account)– Returns the token balance of a specific account.transfer(address to, uint256 value)– Transfers tokens to another account.approve(address spender, uint256 value)– Grants permission for a third party to spend tokens on the owner's behalf.allowance(address owner, address spender)– Checks how many tokens a spender can use on behalf of the owner.transferFrom(address from, address to, uint256 value)– Transfers tokens on behalf of the owner.
How to Deploy an ERC20 Token on Scroll Sepolia
Ethereum is the most secure and decentralized platform, making it ideal for financial applications such as token creation. Scroll, an Ethereum Layer 2 solution, maintains Ethereum’s security while significantly reducing transaction costs. Developers can build scalable dApps with faster and cheaper transactions while staying compatible with existing Ethereum developer tooling and infrastructure. In this guide, we'll create and deploy an ERC20 token on Scroll Sepolia.
1. Connect to Scroll
First, install a wallet like MetaMask or Rabby as a browser extension. Connect your wallet to Scroll Sepolia Testnet. You can do this automatically via Chainlist.org or manually using the following details:
- Network Name: Scroll Sepolia Testnet
- RPC URL:
https://rpc.ankr.com/scroll_sepolia_testnet - Chain ID:
534351 - Currency Symbol: Sepolia ETH
- Block Explorer: Scroll Sepolia Scan
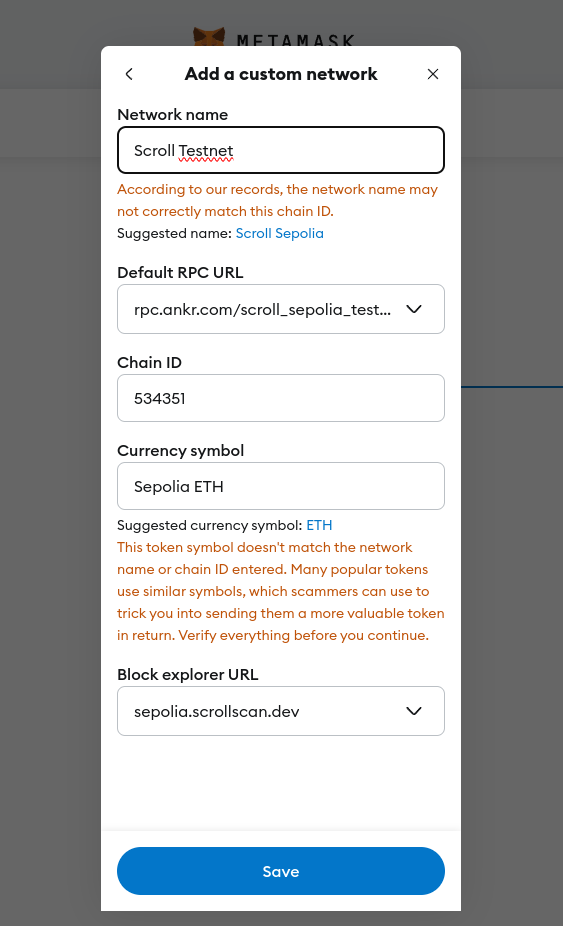
Add Scroll Testnet to your metamask.
2. Get Test Funds
Join the Get Testnet ETH channel on the Level Up Telegram and type:
/drop YOUR_WALLET_ADDRESS
Example:
/drop 0xd8da6bf26964af9d7eed9e03e53415d37aa96045
Alternatively, check out other Scroll faucets.
3. Create the ERC20 Contract
Below is a simple ERC20 token implementation:
// SPDX-License-Identifier: MIT
pragma solidity ^0.8.20;

// DO NOT USE THIS IN PRODUCTION! This smart contract has not been audited and is meant to educational purposes only

// Smart Contract that follows the ERC20 standard
contract MinimalERC20 {
    // Token name, symbol, decimals (in wei format) and total supply
    string public name = "MyToken";
    string public symbol = "MTK";
    uint8 public decimals = 18;
    uint256 public totalSupply = 21_000_000 * 10**18;

    // Mappings to store balances and allowances
    mapping(address => uint256) public balanceOf;
    mapping(address => mapping(address => uint256)) public allowance;

    // Events for logging transfers and approvals
    event Transfer(address indexed from, address indexed to, uint256 value);
    event Approval(address indexed owner, address indexed spender, uint256 value);

    // When the contract is launched, it assigns total supply to contract deployer
    constructor() {
        balanceOf[msg.sender] = totalSupply;
        emit Transfer(address(0), msg.sender, totalSupply);
    }

    // Transfers tokens from sender to recipient
    function transfer(address to, uint256 value) public returns (bool) {
        require(balanceOf[msg.sender] >= value, "Insufficient balance");

        balanceOf[msg.sender] -= value;
        balanceOf[to] += value;

        emit Transfer(msg.sender, to, value);
        return true;
    }

    // Approves spender to use a certain amount of sender's tokens on hes behalf
    function approve(address spender, uint256 value) public returns (bool) {
        allowance[msg.sender][spender] = value;
        emit Approval(msg.sender, spender, value);
        return true;
    }

    // Transfers tokens on behalf of the owner using an allowance
    function transferFrom(address from, address to, uint256 value) public returns (bool) {
        require(balanceOf[from] >= value, "Insufficient balance");
        require(allowance[from][msg.sender] >= value, "Allowance exceeded");

        balanceOf[from] -= value;
        balanceOf[to] += value;
        allowance[from][msg.sender] -= value;

        emit Transfer(from, to, value);
        return true;
    }
}
Alternatively, you can use OpenZeppelin’s Contract Wizard to generate an ERC20 contract with additional features like minting and access control.
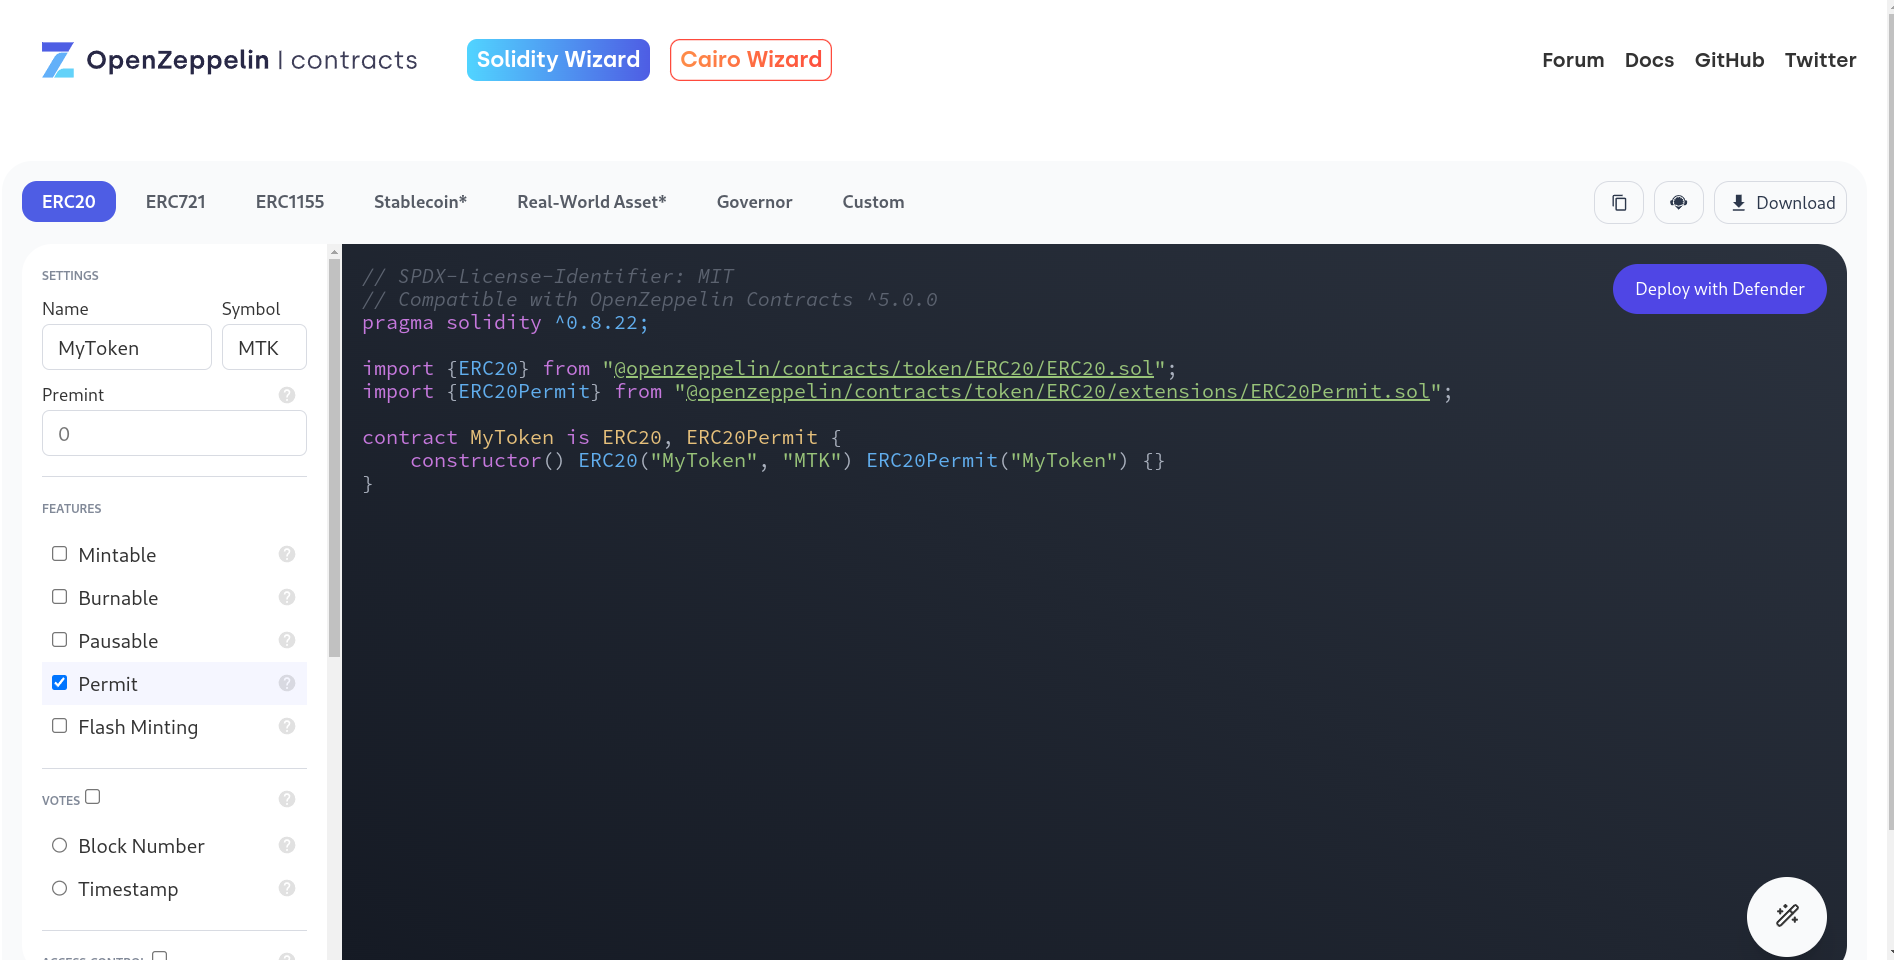
OpenZeppelin’s Token Wizard.
4. Deploy the Contract on Scroll
To deploy your contract on Scroll Sepolia, use tools like:
Deploying with Remix:
- Open Remix
- In the File Explorer tab, create a new file and paste your contract code.
- Compile the contract in the Solidity Compiler section.
- Go to Deploy & Run Transactions, select Injected Web3 as the environment, connect MetaMask, and deploy the contract.
Once deployed, you can interact with your contract via Scroll Sepolia Explorer.
You've successfully deployed an ERC20 token on Scroll Sepolia. In the next module, we'll learn how to build a stablecoin with similar mechanics to USDT or USDC.
More Content
Learn ZK by Deploying a Battle Tested Project.
Learn how to embed crypto trading into your app using 0x Swap API
This guide will show you how 5 different ways with different dev tools to deploy a smart contract on Scroll!
Keep users' data safe by generating proofs in the browser, on Javascript.
A guide on how to use Vyper, Ape & Web3.py to write, deploy & interact with smart contracts